Growing Buddleja davidii from Seed
First, decide which plant to collect seed from. If you want a specific cross you need a fine net tent with the two parents ensconced, otherwise the busy bees will transfer pollen from all the local Buddejas. An alternative, less certain way is to keep the two plants very close and hope that it is statistically more likely they will cross-pollinate than cross with plants more distant. I have resorted to tying flowers together to improve the chances of a specific cross.
Hand-pollination is possible, but the reproductive parts of Buddleja flowers are tiny. Flowers that are to form the seeds should be individually emasculated by removing the upper part of the corolla tube where the anthers are located before they fully open to prevent any self-pollination, although B. davidii is mostly self-incompatible. Pollen can then be transfered with a fine brush to the stigma. Usually, the infloreacence is 'bagged' in a fine mesh bag to prevent random pollination.
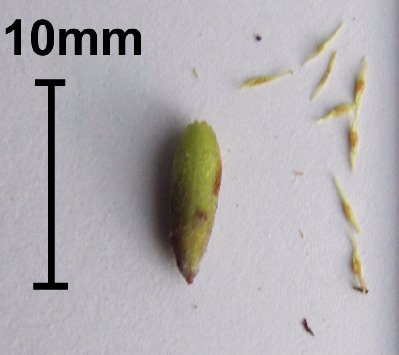
A typical seed pod or capsule is 6-8mm long (left), whilst the tan-yellow winged seeds (right) are tiny.
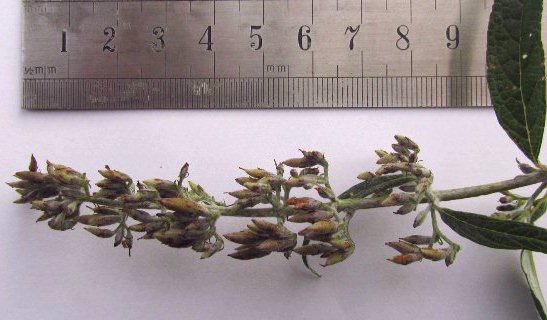
This is a very small flower panicle but still there is in excess of a hundred little pointed seed capsules.
B.davidii has tiny double winged seeds just a couple of millimetres long (see above). Each panicle of flowers can become several hundred little pointed seed capsules (see left), each one containing twenty or more seeds. A small B.davidii shrub may develop twenty seed panicles, a large one many more. That's a lot of seeds from a single plant (a million or more) and, with their wings, these seeds can travel far and wide on the breeze.
To collect seeds is fairly simple. The seed capsules gradually mature and by autumn should be starting to dry out. It is best to cut off the panicle before fully dry as the capsules will split open and release the seeds. The usual method is to place the seed head in a PAPER bag and hang it up somewhere cool and dry. When ready the dried capsules will split releasing their seeds. The bag will become full of seeds and chaff. Not easy to separate so it is probably best to remove just the large pieces of chaff and keep all the fine material. The seeds are so tiny they can pass through a standard kitchen sieve. When you have separated the seeds as best you can they can be stored in a paper envelope until you are ready to sow them.
B. davidii sows itself readily and you would think it would be easy to grow from seed: just leave a few pots around under your shrub and watch the seedlings appear next spring. Yes and no. The chances are that self-seeded plants will be the most vigorous and tenacious individuals, usually lilac or white just like the feral plants that have so successfully colonised demolition sites and railway lines. In order to have any chance of an interesting new plant you really need to quantitatively raise the seedlings; by this I mean giving every seed an equal chance of making it to the flowering stage, the opposite of survival of the fittest.
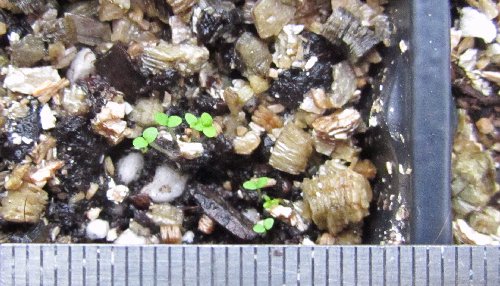
When they first appear the seedlings are tiny. Each division on the ruler is just 1mm!
I have found the following method best. In February sow the seed and chaff thinly on pre-moistened compost mixed with about one third of sharp sand. Cover with a single layer of fine grade vermiculite. Leave the seed tray outside but under cover to get nice and cold for a week, but don't allow the compost to freeze if the ambient temperature is below zero. Then bring it inside on a warm windowsill or in a heated propagator to germinate the seeds. In a week or two tiny, tiny seedlings will appear. The cotyledons or seed leaves will be less than a millimetre in diameter. Once germinated a windowsill is best. If possible keep moist by standing the tray in water briefly as the seedling are delicate, damp off easily and can be crushed by watering. After a few weeks to a month they will be about a centimetre in height and should have their first true leaves.
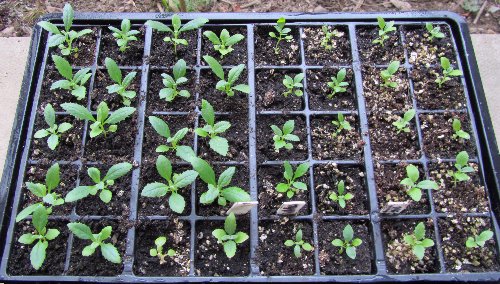
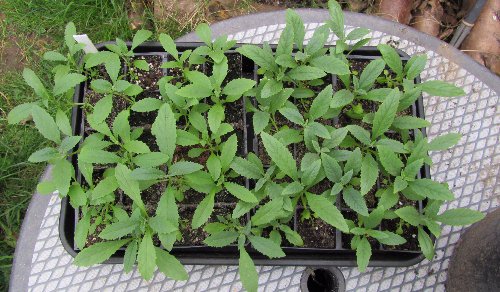
A month to six weeks after sowing prick-out into cells.
This is the important step. When the seedlings are a little bigger, maybe with a second set of true leaves starting, they will need pricking out in the normal way. As always, handle only by the leaves and avoid damage to the stem or roots. A free draining compost is best - sieved multi-purpose or a seed compost with added 10% sharp sand and 20% perlite works well. I usually plant them individually into 3cm or 4cm cells and grow them on until the roots have filled the cell. It is imperative not to pick and choose the seedlings but to plant on a random selection or all them if a reasonable number. This will ensure a good spread of genetic traits from the parents.
They should now grow quickly.
The seedlings can still be prone to damping off so water sparingly. They will be growing quickly now and can be transfered to a greenhouse or coldframe if the weather is warming up.
Once the plants are too big for their cells, probably in May, I pot them into 3 or 4 litre pots and harden them off gradually. They should now grow big enough to flower by September or at least become robust enough to over-winter.
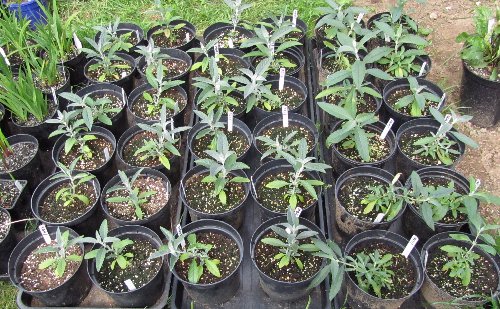
When they have filled the cells with roots pot on into 3litre pots.
If you have chosen your seeds well and with luck some plants will have interesting new flower colour and foliage combinations. Many will probably be boring lilac-purple or white simply because that is a dominant species trait. Variegation is a complex phenomenon that doesn't readily pass from seed parent or at all from the pollen parent. Of twenty Santana and Variegata seedlings I grew not one showed a hint of variegation.
The joy of growing from seed is anticipating and then seeing a completely new plant come into flower. With patience, and a little luck, you will grow unique and garden-worthy Buddlejas all of your own.
Email:
buddlejagarden@gmail.com
© The Buddleja Garden 2011-2025.