Archives
May 2008
May 05, 2008
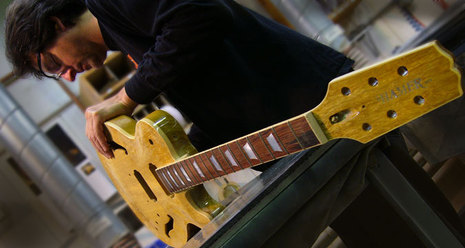
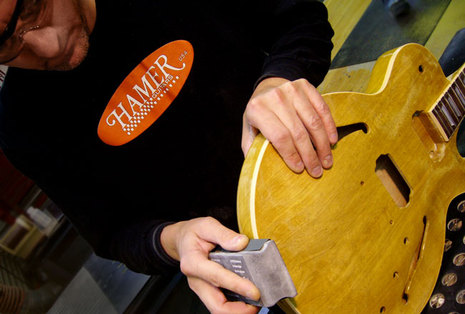
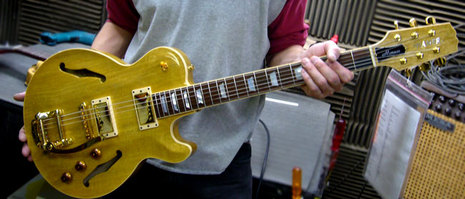
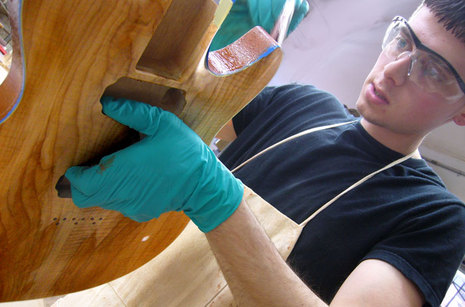
| One of our favorite flavors is African limba. This lightweight and resonant wood machines much like mahogany, but has a characteristic airiness to its tone. We've applied it to many of our designs and even more custom orders. Here, Todd "The God" Gencarella is doing the final leveling of the lacquer on a Monaco built from Limba. This is the last step before he takes it to the buffing wheel. He'll block the finish flat using progressively finer grits of sandpaper (down to 1800) until it is ready to buff. This is the third time Todd will have sanded this guitar's finish—for a total of about three hours. | Each one of the three guys in the finishing area takes a single guitar all the way through the leveling, assembly, wiring and final setup. After the hardware goes on and the electricals are done, the fun part is bringing the guitar's voice to life in the set up room. Todd has now adjusted the pickups, intonation, truss rod and action. He's also changed his shirt. The limba adds an open feel to the sound of the Monaco and is perfectly matched to the unpotted Duncans we've chosen for it. This would be a great guitar for funk and roots music—not too dark or mid-rangy. The light weight is a bonus too. | I'm not always a fan of gold hardware, but on this axe it really works. | May 06, 2008
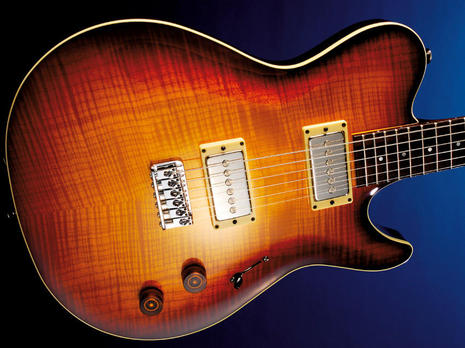
| Very few things in life can kick-start your day like some really appreciative feedback. Out there, in the corporate world, savvy managers know this, and use it to motivate their team. Nothing is more counterproductive at 6:00 AM than a dour remark. Luckily, here in the workshop I don't have to manufacture reasons to praise our guys. Our customers, associates and peers cherish our work and heap praise upon us—I merely pass it on. Sometimes uplifting news is from a client who has left a voice mail or email about how blown away they are, having just received their new guitar. Other times it's news from a touring artist who is getting some great performance out of one of our instruments. Or, like today, someone sends a link to a magazine review of our stuff—like this one. It's an outfit called Musicradar in England, and they've done a history lesson about Hamer as well as a Taladega spread. | I don't know who these guys are or how they got their hands on a Talladega over there in Britain, but they seem to really like it. They've obviously done their homework, as there are a ton of quotes lifted from interviews and promotional material. I'd have to say that they've captured the essence of what the Talladega is all about. You can read it here. Of course, we're professionals and know all about "self-motivation" so nothing inspires us as much as knowing we're doing our own best work. Our allegiance is to our craft. That said, it is nice to know that we're appreciated. It made us feel so good that we put on some Greg V music and got right back to work. | May 12, 2008
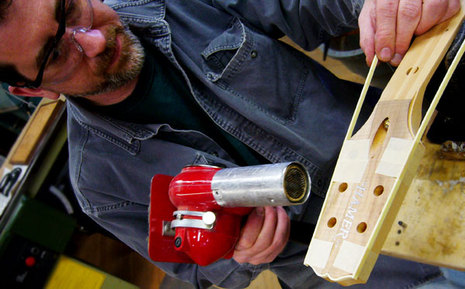
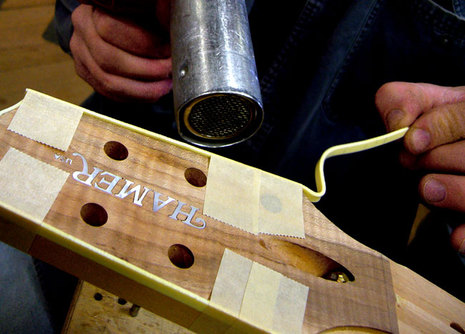
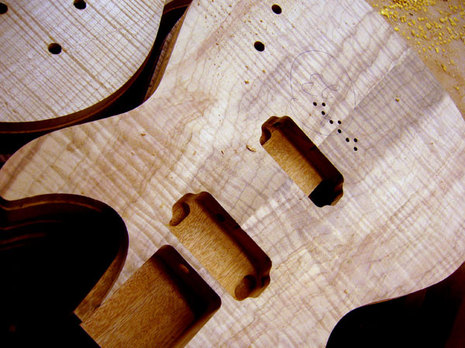
| Now that the the Earthen Talladega guitars have been in progress for a while, the guys have been busy with the details. As we saw in the previous post Enrico was doing the top matches and cutting out the bodies in order to "catch up" with the necks. He'd cut a slice of each top to be used for the headstock faceplate first because the necks take longer and must be started first. When we started this project a few months ago Tom roughed out the neck blanks and installed a truss rods—then the slices of maple were glued onto the headstocks and inlaid with a pearl logos. | Before the Brazilian rosewood fingerboard is glued on, Dave binds the head using the heat gun to soften the cellulose ivoroid strips as he bends it around the corners and glues it down. | The next step is to bond the Brazilian rosewood fingerboard on and let the entire assembly sit for a few months to "normalize" and take its final set before putting a radius on the playing surface. We'll come back after a few more days and see how some of the first guitars are doing. | May 16, 2008
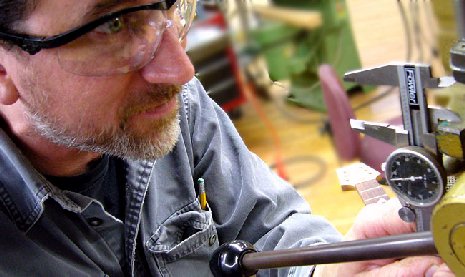
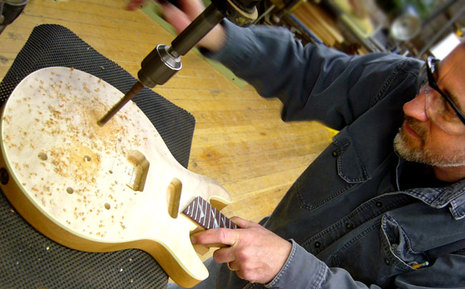
| Yeah, OK... I know it's only drilling holes. So what's the big deal? We just wanted to pass along a little tip for drilling to depth. Dave is about to drill the holes for the tailpiece anchors in a Watson model using the trusty drill press. First he touches off the face of the guitar, then adjusts the stop on the drill press quill to his desired depth using calipers. | With the stop nuts tightened, he can then proceed with drilling. After setting the speed for the diameter of the bit, it's just a matter of locating the center punch mark with the tip of the brad point. With a slow, smooth plunge it's done and he's ready to do the next one. | May 19, 2008
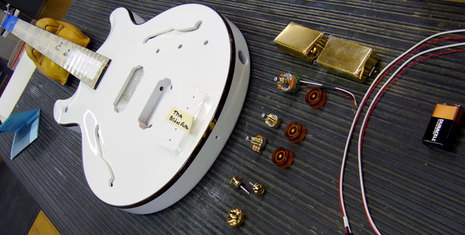
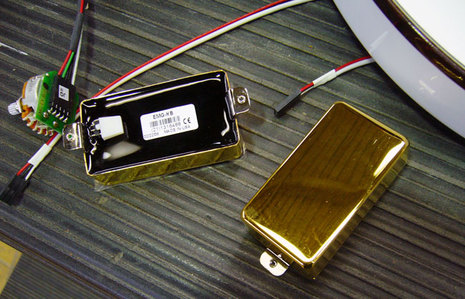
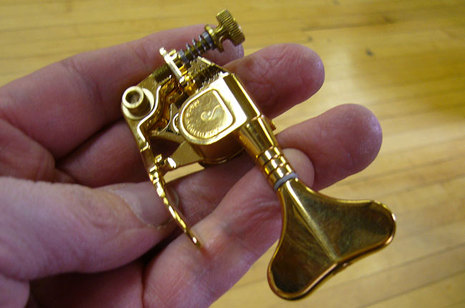
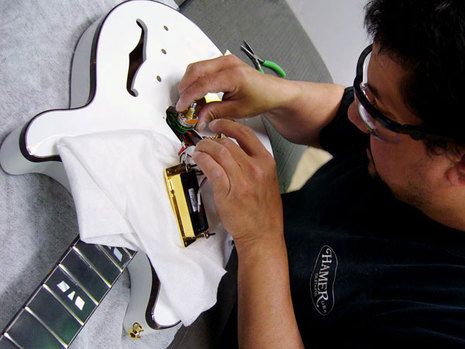
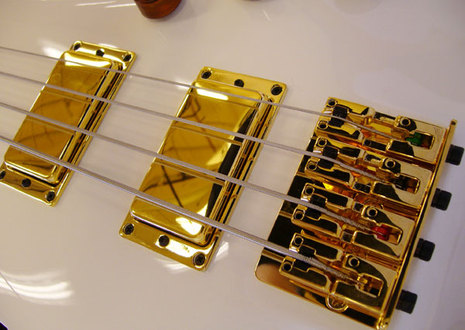
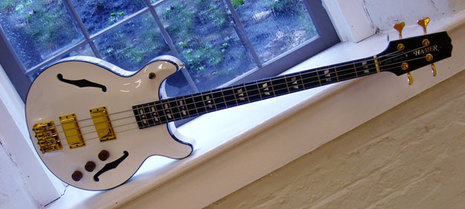
| While we were all being distracted by flying wood chips and holes being drilled, Gary had applied the paint to the Newport Bass for Jack Blades that we've nicknamed "White Falcon." The first thing everyone says when they see it now is "wow... that's really white" or something to that effect. It is finished in a blinding white lacquer that will age and yellow over time, but for now it's Whirlpool White. Mark has buffed it out already and laid it out on the assembly bench along with all the parts. Jack is fond of the EMG HB pickups that we've been putting in all of his basses for years, so that's what I had in mind for this one. Problem was, Jack and I were determined to gussy this bird up with gold hardware, and EMG doesn't make gold pickups. Undeterred, I called up my buddy Rob Turner, the head honcho and kingpin designer at EMG and asked him to do it anyway. Now, Rob didn't get where he is by backing down from a challenge—he didn't even miss a beat when I asked. Sure enough, a few weeks later, here they are. Unobtanium. Thanks Rob. | At the left of the photo is the EXB control that I wanted to use instead of a tone pot. The EXB is sort of like the old school "loudness" control on a stereo system. It simultaneously turns up the bass and the treble, so it's a monster mod on a bass. At the eleventh hour Jack called me and asked if we could put a Hipshot "D" tuner on the bass so he could drop the low string a step with the flip of a lever. Thanks to Fed-X it arrived just in time. | Jack is doing a video and a concert for TV in two days, so everything was falling into place perfectly. It was just a matter of Mark putting the parts on and setting up the bass. | Typically the electronics get pre-wired into a harness on a jig that holds everything in place, then Mark slips it into the bass through the bridge pickup rout. This is a really trick setup—my little "ship-in-a-bottle" effect. I like the way it keeps the back of the guitar uninterrupted and clean. This bass gets the active EMG stuff, so the one exception is a trap door on the back for the battery. This is where planning pays off. We'll come back tomorrow and see how it turns out. | May 20, 2008
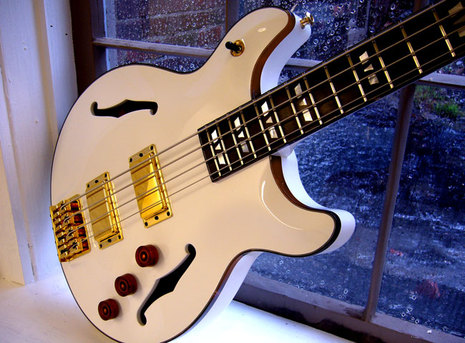
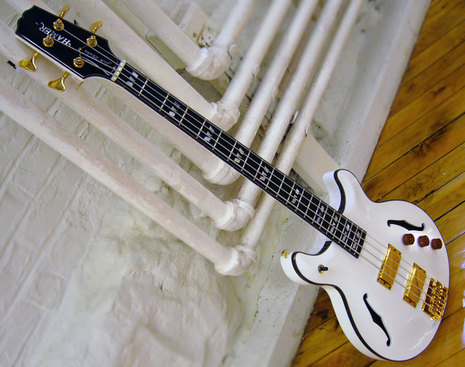
| Things really fell together for our "Night Falcon" bass project for Jack Blades. Apart from some foot-dragging at Schaller for our gold plated bridge, everything arrived on time, including the custom fitted case. With a medium scale (32") this little bird is easy to play, and the tone is spunky enough thanks to the semi-hollow, maple topped body. | The gold-plated bridge is massive and sits on a carved maple "platform" that is situated directly over a solid block inside the body. This gives the bass a really hefty response and a feeling of solidity too. All the gold hardware matches nicely, including the one-off gold covered EMG HB pickups. I like the clean look without any polepieces. | Here she is perched on a windowsill in our 140 year old mill building. The tortoise binding and ebony fretboard were good calls, the bass has a very unified look. The Hipshot drop-D tuner works flawlessly too. | I'm usually a fan of passive pickups, but for the punching and aggressive attack that Jack is looking for The EMG setup was perfect. I think this bird of prey sounds killer, I just hope Jack thinks so too. We'll hear back from him in a few days, so check back to find out if we pass the test. | May 22, 2008
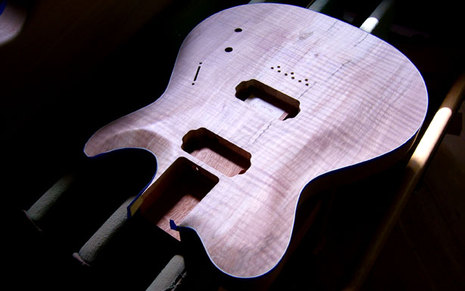
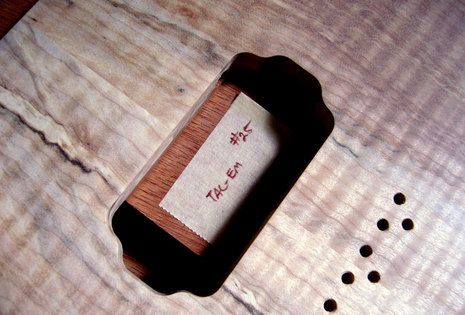
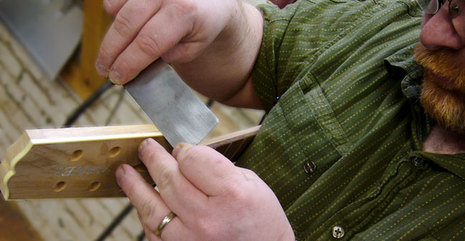
| As readers of this blog know, we were lucky to find a small log of figured maple that had been submerged in mud. The resulting mineral staining gave this wood a unique character that we dubbed "Earthen" maple. We were able to get just over fifty pieces for guitar tops, the first twenty five of which we used for our original Earthen Maple Studio edition guitars. We documented their construction here, in the run-up to their official debut at the winter NAMM convention in January of this year. Those guitars were sold in less than ten minutes after being announced! If you didn't get to see those guitars, here's a photo of the first one: | The guys in the shop had the idea to use the remaining pieces for a special run of Talladega guitars, and we've been showing you glimpses of those as the progress through our workshop. We think that they're turning out really nicely, so let's take a look. | Here is one of the bodies, already bound with cellulose ivoroid, resting in the morning sunlight as the work day begins. The next step is for Mike D. to brush on the paste wood filler. He applies the material and works it into the pores of the wood, then lets it flash off. Then it's a matter of wiping the excess off at the exact right moment. Too early, and it won't stay in the grain, too late and it won't come off at all. This gives the finish a nice flat surface that minimizes the sinking that is usually seen in lacquer finishes. | Here's the last of the run passing on the body bench. Right next to Mike's bench, Jamie is prepping the last details on the matching neck. Here he's putting a flat surface on the side of the headstock with a cabinet scraper. We're really proud of how flat and uniform this surface is on our guitars. A lot of designs rely on curved surfaces to hide irregularities, but we like the challenge of making things flat. Believe me, other builders notice it because it's hard to do. | Each one of the maple tops has had a thin slice removed which is used as the headstock faceplate. It's another little detail that makes these guitars even more special. It means we have to keep track of all the components so that they all go on the same guitar, but the result is worth the effort. After the filler cures for two days, the next step is to hand fit the neck to the body, so we'll have to come back to that later. | May 27, 2008
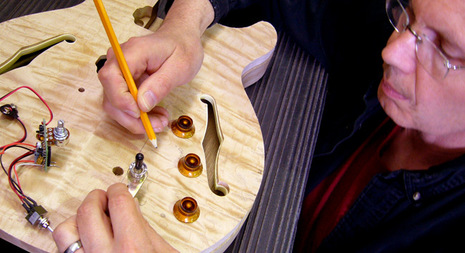
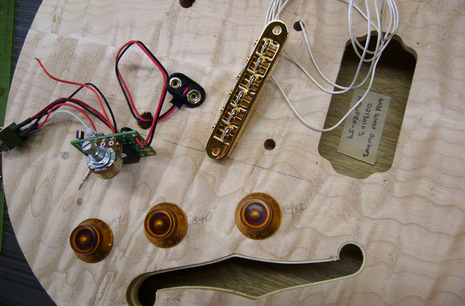
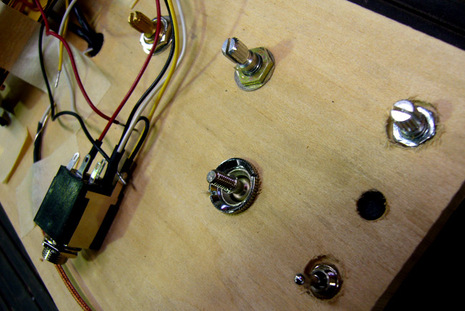
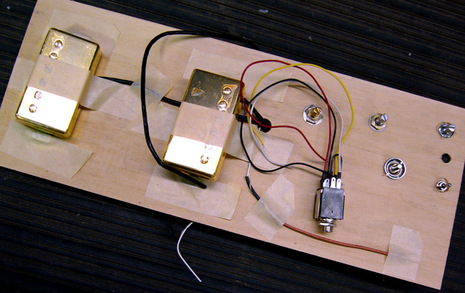
| Every day in the shop is a challenge. Guitarists are constantly asking us for our opinion on how to satisfy their particular needs. Sometimes it's just a matter of prescribing something we're familiar with—those come from our vast experience of working with most of the aftermarket goodies. Other times, it may involve doing something for the first time. Generally, I don't like to experiment with a firm order. There's a certain ethical line we don't like to cross, and doing R&D on the customer's tab is one of them. So, when one of our clients asked for their Newport to be fitted with a Baggs system, we agreed because we'd done it before as a NAMM show sample with a good result. This time, we were going to employ the full Baggs controls along with the electronics, so a bit of planning was involved. The idea is to make everything fit, be accessible and yet still look like it was designed as original—not an afterthought. We've all seen third-party electronics added to guitars where the job looked like a mess, and we didn't want that. | After Mike and I talked the control locations over, he went ahead and built the body up to the point where it was ready for the control holes. Then we physically laid the knobs and switches out on the body to double check their positions. Here I am jockeying the parts around while Mike takes some photos for future reference. It's important to leave enough room between the controls, and their position relative to the other reference points (bridge, tailpiece, etc.) is important too. I've found that we guitarists unconsciously use certain "landmarks" on the guitar to find our way around, so I wanted to make sure to factor that in. Here's what we wound up with. Notice that the different size control holes are called out too. The Baggs system has a neat little stereo/mono switch that is designed to fit flush with the top of the guitar, so the thickness of the top will have to be adjusted in that area to make that happen. | Once we have the locations locked down, Todd transfers them onto a scrap piece of wood so he can begin building the wiring harness. This allows him to pre wire and test the entire system well before the guitar is ready for it. That cuts down on problems in the eleventh hour because if their is a malfunction we still have time to get a new one. It also makes it easier and neater to install. | All the wires can be routed and cut precisely to length outside the instrument. Any issues with crosstalk, noise or cutting out can be solved, and it looks neat too. We think that the inside should look as nice as the outside. There's a lot of effort and time involved with every custom order whether it's a color adjustment or some one-off electronics. It rarely is a matter of just shooting from the hip. This little diversion has involved hours of emails, telephone conversations, workbench R&D time—and it's not even in the paint room yet! With the good planning that years of experience teaches, everything should go smoothly. Measure twice, cut once. | ||||||||||||||||||||||||||||||||||||||||||||||||||||||||
